Puzzles are a major aspect of CrossCode gameplay. Dungeons, including the mini-dungeons associated with many Quests, contain many complex rooms filled with Puzzle Elements that must be interacted with to allow the player to progress, or to unlock hidden treasures. The outdoor exploration areas also include many puzzles, although these tend to be more sprawling and parkour-based.
This page lists and explains the many Puzzle Elements that can be encountered in CrossCode.
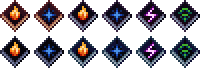
Switches[ | ]
Switches cause effects to happen when activated. They may activate other puzzle elements, open doors, or cause chests to spawn.
| Name | Description | |
|---|---|---|
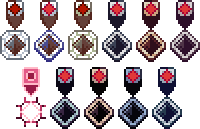 |
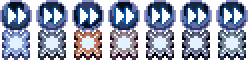
One-time Switch | The basic switch. Must be hit with a Ball or Melee attack to activate. There are three identical-looking types of switches: Normal switches simply activate when hit, timed switches are only active for a short time while they are spinning, and group switches must all be hit quickly to activate them. |
 |
Multi-hit Switch | This switch must be hit several times in quick succession to activate it. Charged Balls are not fast enough to do this, so these switches can't be activated from around a corner. |
 |
Toggle Switch | This switch has two settings, and toggles back and forth between them with each hit. |
| Floor Switch | This switch is activated by stepping on it. Some activate permanently, while others must be held down, either by Lea or by a Block. | |
 |
Bounce Switch | In order to activate a Bounce Switch, a single Ball must bounce off all associated Bounce Blocks and then hit the switch. |
 |
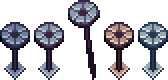
Element Pole Switch | In order to activate an Element Pole Switch, a single Ball of the corresponding element must pass through all associated Element Poles, lighting them up. |
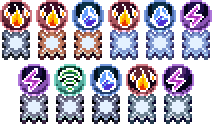
| Steam Pipe Switch | Activated by the burst of steam from a Steam Pipe. Comes in permanent, timed (only active for a few seconds), and group (hit all simultaneously to activate) versions. | |
 |
Propeller Switch | This switch is activated by exploding a Bubble on it, generating a cloud of steam. It only stays active for a limited time. |
 |
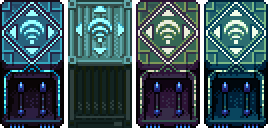
Tesla Switch | This switch is activated by a bolt of lightning from a Tesla Coil Source. Comes in permanent, timed, and group versions. |
 |
Wave Switch | This switch is activated by sending a Compressed Wave Ball through it. Comes in permanent, timed, and group versions. |
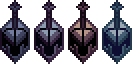
| Red Ferro Switch | This switch is activated by sending a Ferro through it. | |
| Yellow Ferro Switch | This switch is only active while a Ferro is sitting on it. Ferros that pass over it are stopped, so that it can be easily activated. |
Ball Puzzle Elements[ | ]
These puzzle elements are used to build puzzles in which a charged Ball must be bounced.
| Name | Description | |
|---|---|---|
 |
Bounce Block | Once hit, they reset a ball's bounce limit and glow. Once all of them have been hit by the same ball, a bounce switch can be triggered, but only by the same ball. |
 |
Corner Block | An angled block that can be summoned and removed. Used to direct Charged Balls around corners. |
 |
Directional Ball Changer | These devices change the direction of travel of any Balls that pass through them. |
 |
Slowing Ball Changer | These devices change the speed of any Balls that pass through them. In most cases the balls are slowed down, however some may speed up an already slowed Ball. |
 |
Resetting Ball Changer | These devices cancel any effects on Balls that pass through them. |
 |
Elemental Ball Changer | These devices change any Ball that passes through them to their corresponding element. |
 |
Element Pole | An elemental Ball shot into an Element Pole will come out of the other orb, allowing Balls to be redirected to another height. The pole will be infused with that element for a short period or until shot again, which can be used against Pada Moths. Groups of Element Poles can also be used to activate Element Pole Switches. |
 |
Short Elemental Pole | Due to these shorter poles only having a single orb, they are only used to activate Element Pole Switches. |
 |
Rotating Corner Block | This version of the Corner Block can be rotated to change the direction Balls will be bounced in. It is also used to redirect Compressed Wave Balls. |
| Ball Blocker | Ball Blockers destroy any Balls that hit them, and are used to restrict the angles available for trickshots. |
Barriers[ | ]
Barriers (usually temporary) that restrict the player's movement or ranged attacks.
| Name | Description | |
|---|---|---|
 |
Blue Wall | A wall that blocks everything. In the TechDemo, it was possible to walk on top of these, which was used for some puzzles, but this interaction has since been removed. |
 |
Orange Wall | Similar to the Blue Wall, but Balls can pass through an Orange Wall, allowing switches on the other side of it to be activated. |
 |
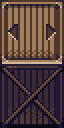
Red Wall | A wall that destroys all Balls that hit it, similar to the Ball Blocker. |
 |
Blue Gate | A variation on the Blue Wall, typically used for surprise combat or over pits where the Wall's obvious base is not desired. |
 |
Orange Gate | A Gate version of the Orange Wall, this will let Balls pass through it. |
 |
Red Gate | A gate that throws back anyone unauthorized who tries to pass through it. These are typically used to prevent sequence breaking, but also block shortcuts, forcing players to reach the other side to unlock them. |
| Block Barrier | A very short Blue Wall that can easily be walked over. These are only used to temporarily restrict the movement of Blocks. |
Temporary Platforms[ | ]
Platforms that can move or disappear. May have another puzzle element on top of them.
| Name | Description | |
|---|---|---|
 |
Vertical Moving Platform | A platform that is controlled by switches to move up and down. |
 |
Horizontal Moving Platform | A platform that is controlled by switches to move back and forth. |
 |
Floating Platform | A platform that moves along a predefined path. May be stopped or started by switches. |
 |
Switched Laser Bridge | While most laser bridges just form permanent pathways, some can be switched on and off. The smaller ones are typically used in puzzles, while the larger ones serve more frequently as shortcuts that can only be activated from the far side. |
 |
Lorry | This platform moves along a track. Some Lorries will move constantly, while others only move when Lea is standing on them, or require Propeller Switches to be activated to move them. |
 |
Lorry Respawner | Standing on this mark causes the Lorry to respawn at the start of the track. |
| Lorry Rail | The path that a Lorry follows. | |
| Lorry Rail Switch | Switches between two Lorry Rails, changing the path the Lorry will follow when activated. | |
 |
Timed Platform | These platforms quickly appear and disappear in sequence, so careful timing is required in order to traverse across them. |
Terrain Types[ | ]
These cover the floor in an area of the room, and have special effects.
| Name | Description | |
|---|---|---|
 |
Ice | A slippery surface; causes the player to have difficulty stopping and maneuvering. |
 |
Quicksand | The player slowly sinks into it, taking damage if they disappear completely. |
 |
Coals | Acts similar to water or a bottomless pit, damaging and respawning anyone who falls into it. However, dropping a Frozen Bubble in the Coals will create a short-lived platform that can be used to cross it. |
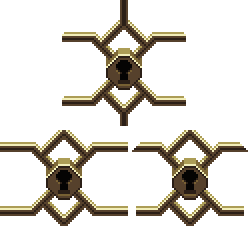
Key Panels[ | ]
These puzzle elements are used with dungeon keys.
| Name | Description | |
|---|---|---|
| Key Panel | Standing on a Key Panel while holding a dungeon key will let you shoot key-shaped Balls. Hitting a Key Wall or the metal pillar of a set of Key Pillars with these Balls will destroy it, consuming the dungeon key. | |
 |
Key Wall | |
 |
Key Pillar | |
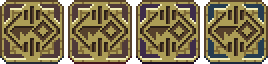 |
Boss Key Panel | The golden version of the Key Panel and Key Wall work with the dungeon master key and give access to the boss. |
 |
Boss Key Wall |
Objects and Object Spawners[ | ]
These puzzle objects can be found on object spawners, or created by enemies. They can be moved around freely and interacted with.
| Name | Description | |
|---|---|---|
| Bomb Panel | Bombs can be found on Bomb Panels, and are also created by Kamikatzes and the X01 Driller H.F.S. When first hit (or immediately for the ones spawned by Kamikatzes), the Bomb is activated, and bounces forward a short distance. If hit again, or after a short delay, it explodes, damaging any nearby players or enemies. If hit by a Heat attack before or after activation, the Bomb will streak forward in a straight line, detonating when it hits an object. | |
| Bomb | ||
| Water Bubble Panel | Water Bubbles can be found on Water Bubble Panels, are created by Trijellys and the Master Magmoth. Water Bubbles can be knocked around by hitting them with normal attacks. Heat attacks will cause them to explode in a cloud of steam, which damages players and enemies caught in it and activates Propeller Switches. Water Bubbles spawned by enemies will home in on the player and explode automatically after a few seconds delay. Water Bubbles flash and then disappear after being onscreen for a moderate length of time.
| |
| Water Bubble | ||
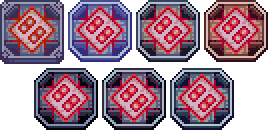
| Element Shield Source | Element Shields can be found on Element Shield Sources, and are created by Final Turret IX and Designer. Element Shields move towards attacks of the matching element, but are knocked away by any other attacks. Hitting them several times quickly with the matching element (or two Compressed Balls) will destroy them, causing the player to gain a shield protecting them from the matching element for a short time. | |
| Element Shield | ||
 |
Ferro Spot | Ferros are a highly versatile puzzle element found in the Ku'lero Temple. They spawn on Ferro Spots, which also serve as switches and checkpoints when a Ferro is placed on an inactive Spot. Ferros interact differently with each element. Neutral attacks move them a short distance. Heat attacks knock them a long distance, and cause them to ricochet off walls. Cold attacks knock them a medium distance, and cause them to be briefly affected by gravity, allowing them to drop down to lower areas. Shock attacks pull Ferros towards the player, regardless of the direction from which the attack came. Wave attacks cannot directly move a Ferro, but they can teleport one to a Wave Teleporter.
|
| Ferro |
Steam Elements[ | ]
These elements are exclusively used in conjunction with the Bubbles described above.
| Name | Description | |
|---|---|---|
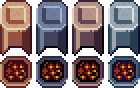 |
Steam Oven | Shooting a Frozen Bubble into a Steam Oven will cause a puff of steam to travel through the attached Steam Pipe, activating a Steam Pipe Switch if it reaches one. |
| Steam Pipe | ||
| Steam Turnout | Switches between two different Steam Pipes, changing the path that the steam travels. |
Blocks[ | ]
Large objects that can be moved around the room. Some may have another puzzle element on top of them.
| Name | Description | |
|---|---|---|
 |
Push-Pull Block | A block that can be directly interacted with to push or pull it in a straight line. Can also be moved with Magnets |
 |
Directional Push-Pull Block | A variation on the Push-Pull Block that can only be moved north-south or east-west, not both. |
 |
Wave Push-Pull Block | A variation on the Push-Pull Block. When a Wave ball is bounced off this block and hits a Wave Teleporter, the block will be teleported to the teleporter. This also works with Compressed Wave Balls that pass through the block. Multiple Wave Push-Pull Blocks can be stacked by teleporting them at the same time. |
 |
Sliding Block | A block that can be found on ice and, when hit with a Ball, will slide in a straight line until it hits an obstacle. It can be moved by Bomb explosions too, but can't be manually pushed. |
 |
Block Destination | A platform that moves down when a Block is placed on top of it, trapping the Block. This can either serve as a switch, or lower the Block in such a way that it can be used as a step. |
Jump Panels[ | ]
Panels that propel the player long distances.
| Name | Description | |
|---|---|---|
 |
High Jump Panel | Propels anyone standing on it to the top of the adjacent cliff. |
 |
Long Jump Panel | Propels anyone standing on it a long distance in the direction indicated. |
Teleporters and Similar[ | ]
These elements move the player between rooms, or instantly teleport them between locations within a room.
| Name | Description | |
|---|---|---|
 |
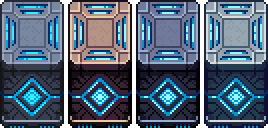
Teleporter | A panel that teleports you to its corresponding teleporter in another room when activated. Blue teleporters are inaccessible from this side. |
 |
Sky Rail Station | Carries users to a location on another map. |
 |
Quicksand Hole | Drops the player into the room below when stepped on. Glitched ones found during the An unfortunate Series of Features quest instead drop the player in a different location in the same room. Found in quicksand. |
 |
Wave Elevator | A teleporter that moves you vertically between rooms. |
| Wave Teleporter | Shooting a Wave ball into this teleporter will teleport the player to it. Wave Push-Pull Blocks and Ferros can also be moved using these. | |
| Wave Teleporter Marker | Indicates the location of a Wave Teleporter. In some cases, the Wave Teleporters will be invisible, and these markers are the only indication of their presence. To reveal the Wave Teleporters, stand on a different marker. |
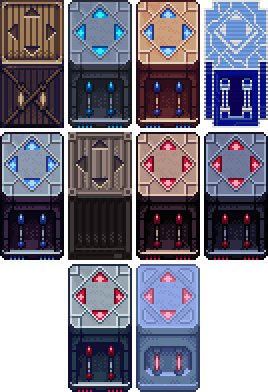
Puzzle Destructibles[ | ]
These puzzle elements often block progression, and can be temporarily or permanently destroyed in order to get past them.
| Name | Description | |
|---|---|---|
 |
Destructible Box | A simple destructible that can be broken by any attack. May hide enemies. |
 |
Large Destructible Box | A larger version of the standard Destructible Box. May take multiple hits to destroy. |
 |
Directional Destructible Box | This version of the Destructible Box can only be destroyed from the unprotected side. |
| Ice Block | Can only be destroyed with Heat-elemental attacks. Some Ice Blocks can never be fully destroyed, and respawn shortly after they are melted. It is sometimes necessary to avoid destroying Ice Blocks so that they can be later used as platforms. | |
 |
Bomb Block | Can only be destroyed by a Bomb. May hide enemies. |
 |
Bomb Wall | A Bomb Block that hides a door, and may be difficult to spot. |
 |
Water Block | Knocks the player back if they hit it, and damages them if they fall into it. Heat attacks will destroy it, while Cold attacks and Frozen Bubbles will freeze it, making it reflect (non-Heat) Balls and allowing the player to stand on it. In both cases, it returns to normal after a short period. |
 |
Flame Destructible | Damages the player and knocks them back if they walk into it. Can be temporarily destroyed by shooting a Frozen Bubble into it. Switches are often needed to permanently disable it. |
 |
Destructible Wall | A wall that is easily destroyed by any attack, but may be difficult to spot. |
| Shock Destructible | Knocks the player back if they walk into it. Can be temporarily destroyed by shooting a Compressed Wave Ball through it. Switches are often needed to permanently disable it. | |
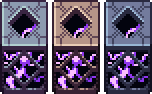
 |
Ferro Destructible | Can only be broken by sending a Ferro into it using the corresponding element. |
Compressed Ball Elements[ | ]
These puzzle elements are useed in combination with the Compressed Shock and Wave Balls.
| Name | Description | |
|---|---|---|
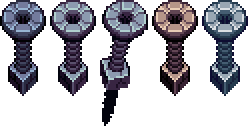
| Compressor | A Compressor is charged by hitting it multiple times with Shock or Wave. Once charged, a Charged Ball or Melee attack of any element but the opposing one will cause the Compressor to launch a Compressed Ball in the opposite direction. | |
 |
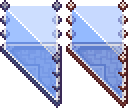
Compressed Shock Ball | When Compressed Shock Balls touch a wall, they will begin to follow it. Destroying or removing the wall causes them to return to travelling in a straight line. They can generally activate the same puzzle elements as normal Shock Balls, and can also activate Tesla Coil Sources. |
 |
Compressed Wave Ball | When Compressed Wave Balls touch a wall, they will pass through it, turning so that they enter the wall straight-on. They can generally activate the same puzzle elements as normal Wave Balls, and can also activate Wave Switches. |
| Anti Compressor | Anti Compressors destroy any Compressed Balls that pass over them. | |
 |
Tesla Coil Source | When hit by a Compressed Shock Ball, Tesla Coil Sources will emit a pulse of electricity that can activate Tesla Switches and Tesla Coil Discharges. |
 |
Tesla Coil Extender | These extend the range of Tesla Coil Sources, transmitting the electricity pulse of any Source that reaches them. |
| Tesla Coil Discharge | When activated by a Tesla Coil Source, these send out a pulse of electricity that damages the player and enemies and can break Blue Rays. | |
 |
Compressor Bouncer | When a Compressed Shock Ball travelling along a wall reaches one of these, it will bounce off the wall following the direction of the arrow. |
Miscellaneous Features[ | ]
These puzzle elements do not fit into the groups described above.
| Name | Description | |
|---|---|---|
 |
Enemy Counter | A panel in the floor that activates when the displayed number of enemies are defeated. Some of them cause new enemies to spawn on reaching predefined thresholds, allowing for gauntlet-type challenges. |
 |
Glowing Line | Links a switch to the object it affects, and lights up when the switch is active. |
 |
Monk Turret | An unkillable turret. Deals next to no damage, but its knockback is dangerous while platforming. |
 |
Magnet | When activated by a Shock attack, Magnets pull Push-Pull Blocks towards them, allowing the blocks to cross gaps. They can also be used to break Ocubepus. |
| Element Turret | These unkillable turrets shoot a steady stream of projectiles with low damage, but their very high knockback make them impossible to pass without using an Element Shield. | |
| Ferro Line | A special version of the Glowing Line used for Ferro Spots. This line glows green while the Ferro is on the Spot, and red when the Spot is active but the Ferro is not on it. | |
| Ferro Respawner | A special version of the Multi-hit Switch used for Ferro Spots. Activating it causes the Ferro to respawn on the Spot. |
Removed Puzzle Elements[ | ]
These puzzle elements are not found in the current version of the game.
| Name | Description | |
|---|---|---|
| Enemy Switch | Only seen in the TechDemo. This switch must be hit by an enemy projectile to activate. Monk Turrets and Repeater Turrets are known to work with it. | |
| Repeater Turret | Only seen in the TechDemo. These indestructible robots fire a ranged attack at the player whenever they are hit. |